Showing posts with label research. Show all posts

Sunday, January 11, 2015

Sony A7 II (ILCE7M2) First Impressions

Last month I purchased a Sony a7 II camera* (ICLE-7M2K), and I love it. It has a lot of advantages over the Sony NEX 6, but also a few downsides. You can read my initial review and long term review of the Sony NEX 6 here. All photos on this page were taken with the a7 II and (usually) edited in Lightroom. Click on any of them to see a larger version.
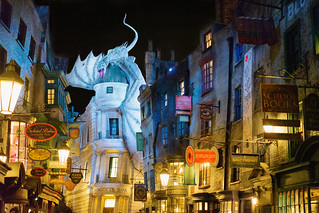
Gringotts Dragon
In my previous writing about the NEX 6 and other mirrorless (or EVIL) cameras, I noted how they would probably replace dSLRs for most kinds of photography. Not only are they smaller, lighter, and easier to use, they produce images that are just as good as their dSLR counterparts. Today, unless you're shooting sports, weddings, or other fast-moving action, I think buying a dSLR is a big mistake.

The a7 II is a new camera, and costs a lot more than the NEX 6 models which I purchased in 2012 to replace my Canon 7D. Even the Sony Alpha A6000, a fast-focusing successor to the NEX 6 costs a lot less.

For that extra cost, I think there are a lot of advantages to the a7 II. First, the camera is a lot more competitive with high-end dSLRs in some key areas. It’s startup time and wake time from sleep seems much faster than the NEX 6. The a7 II still starts slower than a DSLR (which can be almost instantaneous), but I think it's now fast enough. If these improvements are in areas you care about, it may be worth the extra cost.

Battery Life

If you read my review of the NEX 6, you may remember that I was critical of the battery life, especially if you used the eyepiece instead of the rear LCD. Both the NEX 6 and a7 II have a similar rating in terms of the number of shots you can take, and they both use the same model of battery.

Mangrove Sunset
I suspect that you can get more battery life out of the a7 II simply because there is less of a penalty for turning the camera off or letting it sleep (AKA power saver mode). I configured the a7 II to go to power saver mode in ten seconds for exactly this reason. Time will tell if this has a real impact.

The battery life of a DSLR is hard to beat simply because you don't have to light up a screen to use the camera. The electronic viewfinder of these cameras might eat the batteries, but it also makes the camera a lot easier to use. I have a set of fully charged Wasabi batteries that I carry with me just in case I burn through the first battery. Unless I'm visiting a very photogenic spot, one battery usually is enough for a day’s worth of still photography.

Construction

Another area of significant difference between the NEX 6 and the a7 II is the way the cameras are built. The a7 II has a magnesium alloy body that feels quite solid. The a7 II weighs significantly more too. Many of the buttons and switches of the a7 II feel as if they were lathed out of solid hunks of metal. I like the luxurious feel.
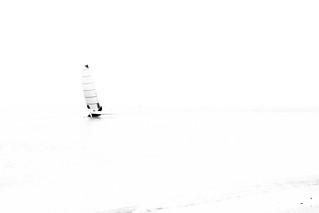
Hurricane Pass
The bottom of the camera is significantly thicker than the NEX 6 as well, which makes the camera larger, but also provides a larger, more stable base for a tripod mount. The bottom is improved in other ways too: the articulating LCD screen is more recessed and protected from this angle. Unlike the NEX 6 design, a tripod mount is unlikely to interfere with the movement of the display.

The NEX 6 isn't advertised as weather proof, yet mine has been in rainstorms around the world and survived just fine. I’m sure to indulge in even more electronics-unfriendly behavior now that I have a a7 II, which is actually advertised as having weather seals.

Another design difference: a large DSLR-like bump contains the electronic viewfinder of the a7 II. The a7 II looks more like a traditional camera, but I liked how the NEX 6 just used a tiny corner of the body without taking up extra space. The a7 II viewfinder also extends further from back from the body of the camera. The extra length probably makes it more comfortable to use, but is another tradeoff because it makes the camera larger.

Usability

The menu system on the a7 II is a vast improvement over the NEX 6. The NEX 6 divided important settings between “Camera” and “Setup” menus that each had long lists of settings. I never knew which menus held which items; both of the screens contained “setup” things for the “camera”. This led to a fun game of “find the setting”, where I would scroll through a huge list of items in one screen, then have to back out and try the other one.

The a7 II has a breaks down categories of settings into pages, but almost all of the settings can be paged through linearly without having to tediously back in and out of screens. The whole system seems very responsive compared to the NEX 6, and similarly fast to a dSLR like the Canon 7D.

Phoenix Fire Lighters
Along those lines, you can customize many of the buttons on the camera to enable you to change different settings quickly. This feels a lot more like my Canon 7D, which is studded with buttons so you can change the important settings without removing the camera from your eye.

The a7 II also has an exposure dial right on the body. I’m not sure if I like that feature or not. On one hand, there is a dedicated dial, on the other hand, it is easy to bump or forget to look at the setting (which is shown in the viewfinder as well, but I sometimes forget to check it). On the bright side, you're much more likely to notice an exposure problem on the a7 II (or NEX 7) than a DSLR because the setting impacts how the scene looks in a viewfinder.

The Canon 7D also has wheels you can configure to change exposure, and it is quite easy to shoot many photos under or over-exposed without realizing it. Obviously the image in optical viewfinder looks the same no matter how poor your exposure is. All of these cameras have a scale in the viewfinder to show the exposure compensation. I tend to forget to look at it, that's all.

Like the intelligent modes in the NEX 6, the a7 II has an auto mode that does a great job of deciding what kind of scene you're shooting and configuring the exposure, ISO, and aperture intelligently. Unless you're going for a very specific effect, this is a great way to shoot travel photography, or any other photography where you may not have a lot of time decide if you'd prefer shallow or deep depth of field, or if a scene is backlit or not.

The a7 II also has a scene mode, which lets you manually choose what type of photos you're taking: sports, landscape, portrait, and so on. This is useful if you're going to take lots of photos of a certain kind, or if you're going to hand the camera to a stranger for a photo.

Full-Frame Sensor

Finally, one of the big selling points of the camera is that the sensor is full-frame. The advantages of full-frame may not be obvious. The NEX 6 camera’s sensor is what they call an APS-C sensor, or a crop sensor. With the same lens, an APS-C sensor takes a photo that looks zoomed in 1.5x compared to a full-frame sensor. That means to get the same photo with the same lens, you'll need to get closer to the subject  with the full-frame — making up for the lack of zoom effect. Getting closer to the subject means that you can blur out the background even more with the same aperture.
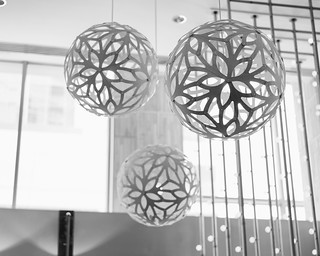
Lighting

On the other hand, if you love landscape photography, or you're always at the long end of your zoom range, the full frame might not be as useful to you.

Lenses

When I last wrote about the Sony NEX 6, there weren't many full-frame lenses available for E mount cameras (the E-mount is sometimes called EF-Mount when using full-frame lenses). Although there aren't as many full-frame lenses as the Canon or Nikon system, there are many more choices out than there were just last year. Most of the more important focal lengths are covered.: there are two great lenses for the 28-70mm range, a 16-35mm lens that is getting great reviews.

The lenses for EF-Mount don't tend to have as aggressively large apertures as are available for dSLRs. Canon, for instance sells 50mm prime lenses at maximum apertures of f1.8, f1.4, and f1.2. The fastest aperture lens that Sony sells is the Zeiss Sonnar T FE 55m f1.8 lens. I own it, and it makes very sharp images even at the maximum aperture, something that isn't always true.

If you don't mind manual focus (or very slow autofocus), there are adapters for common lenses. I’ve use an adapter for my Canon L Glass on the NEX 6 with lots of success. The focus peaking and zooming makes manual focus much easier than on a dSLR. Many folks are using Leica glass on their Sonys for that reason. If 1.8 isn't fast enough for you, or you need a longer lens than the Sony 70-200mm lens, an adapter will let you use your favorite lens from another brand.

There are advantages to the Sony full-frame lenses too. They are typically smaller and lighter than the dSLR equivalents, and in general they seem to be getting good reviews. I own the Zeiss/Sony Sonnar T FE 55m f1.8 lens. It's quite sharp even wide open, it can blur the background nicely, and really looks and feels like a quality piece of equipment. This is a great lens for taking photos of people (the next photo used this lens, be sure to visit the full size).
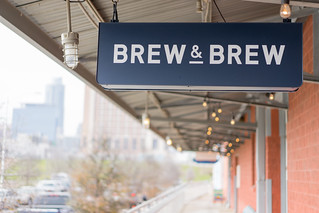
Brew & Brew
I purchased the a7 II in a kit with the Sony 28-70mm f3.5-5.6 Lens, also available separately. This lens is a great general-purpose zoom, and is reasonably priced, especially compared with the Zeiss/Sony 24-70 f4 lens. Either of these lenses are great for travel and landscape photography. Both have built-in image stabilization which compliments the a7 II's sensor-based stabilization. Both are also weather sealed, to help prevent dust and moisture from harming the electronics.

Image Stabilization

Another reason for the greater thickness of the a7 II is the sensor-based 5-axis optical image stabilization built into the body. This is one of the primary features that made the camera attractive for me. I shoot a lot indoors and at night. The ability to add stabilization to almost any lens makes handheld shooters like me happy. Sony claims that lenses with built-in 2-axis stabilization will get the remaining 3 axes stabilized with the same method.

Dragon's Fire
Image Stabilization is useful only when doing handheld photography. It helps with low-light photography, and certain kinds of sports or other action photography where you'll be moving the camera quickly to frame shots (I'm not sure this would otherwise make a good sports/action camera though; others might focus faster). The stabilization might be useful for handheld macro photography too since macro makes movement more apparent.

One thing image stabilization won’t do is reduce blur in a moving subject. For that you need fast shutter speeds.

Social Media Camera

The a7 II makes a fantastic social media camera. Like the NEX 6, the camera can create an ad-hoc Wifi network, and there is a free iPhone and Android “PlayMemories” app that will transfer JPEG versions of photos off the camera (even though I shoot raw on camera this still works). These cameras are my secret trick for making really sharp Instagram posts (the following photo was transferred from my a7 II, edited on my iPad, and posted to Instagram, Twitter, and flickr).

Holding back erosion, Honeymoon Island. #beach
Unlike the NEX 6, there is a dedicated button on the camera. View the photo you want to transfer to your phone or tablet, hit the Fn button, and you can transfer the image in seconds. The a7 II is much faster and more reliable at this than the NEX 6.

I can transfer, edit, and share photos from the a7 II in just a few minutes if everything goes smoothly. I share a lot more photos than I otherwise would because of this feature. I’ve only tested this on my iPhone, but I'm guessing the situation is the same on Android phones.

Conclusions

I'm really enjoying the upgrade to the a7 II. The larger sensor and stabilization make my life easier in the frequent situations where I’m taking photos at night or in dark restaurants. The additional programmable buttons makes it easier to configure the camera on the fly. The faster Wi-Fi sharing means that I share many more photos to social media.

If you're even more of a night photographer than I am, and you don’t mind lower resolution (and no in-body stabilization), you might also look into the Sony a7s, which has low noise at astronomically high ISOs (ISO 409,600 vs ISO 25,600 on the a7 II).

If you’re not quite ready for the cost of full-frame camera (and the pricier full-frame lenses), the Sony Alpha A6000 (the successor to the NEX 6) is a fantastic camera that can take photos rivaling a dSLR at a fraction of the size.

Improvements over the NEX 6

  • Faster startup time
  • Sensor-based 5 axis stabilization for lenses without stabilization; will also enhance the stabilization of sony lenses with built-in stabilization (OSS)
  • Similar focus speed
  • Many buttons that can be customized
  • Same excellent auto mode
  • Weather sealing
  • Magnesium alloy shell
  • Same battery
  • Larger, deeper grip
  • Easier and faster to navigate settings menus
  • Much faster wifi sharing of photos to iOS devices, with dedicated button
  • Higher resolution (24.3 megapixels vs. 16.1 megapixels)
  • Higher maximum shutter speed of 1/8000 vs 1/4000 S
  • Higher flash sync speed of 1/250 S vs 1/160 S
  • Similar power consumption: each can take 270 photos using the viewfinder, or 360 using the rear LCD
  • Similar ISO range: ISO 100 - 25600 (the a7 II also has extended ISOs below 100 starting at ISO 50)
  • Higher maximum ISO in auto mode (ISO 6400 vs 3200)

Disadvantages of the a7 II vs. the NEX 6

  • 74% Heavier (599g with battery and media vs. 345g)
  • Bulkier
  • Full frame lenses are needed to get the most out of the camera, although crop-sensor lenses will work (the crop-sized image will be about 10 megapixels)
  • Lower maximum burst capture (10 FPS (frames per second) for the NEX 6 vs 5 FPS, although the NEX 6 will only track focus at 3FPS, while the a7 II will track focus at 5)
  • No built-in flash


*Moving Average Inc. is a participant in the Amazon Services LLC Associates Program, an affiliate advertising program designed to provide a means for sites to earn advertising fees by advertising and linking to amazon.com. Buying items through this link helps sustain my outrageous camera addiction and is much appreciated!

Tuesday, May 27, 2014

More App Store Ad Experiments: Platform Targeting

Note: This essay continues from questions raised by the previous essay on A/B testing in the App Store

In my last essay, I explored some ideas on how to improve results in the App Store by experimenting with ads. I ran Facebook Ads to A/B Test the Click Through Rates (CTR**) of two different images.

Based on the differing CTRs, I jumped to the conclusion that the composition of the images made the difference. In one ad, an entire iPad was shown. In the other ad, most of an iPhone was cut off, except for the screen. In other words, I believed that the way I depicted the iPad or iPhone resulted in more clicks. I didn't doubt that I was one step closer to buying a tropical island.

Manton Reece read my article and immediately wondered if maybe the iPad vs. iPhone split could account for the difference. In other words, maybe folks were more likely to click on an ad that depicted the device they were holding in their hands. I immediately slapped my forehead. My app island slipped below the waves. I vowed to figure out what really happened with my last experiment.

TLDR: Manton was correct. Also, implementing the changes suggested by Manton’s hypothesis improved my CTRs quite a bit.

A New Experiment

To start examining the Manton Hypothesis, I first tried sifting through the ad data Facebook provides. Perhaps I could see which clicks belonged to iPads and which belonged to iPhones or iPod Touches*. Unfortunately I couldn't find that information. It didn't seem like I could examine Manton’s theory with the ad data I already collected.

No worries, I can find out with another experiment! The Facebook Mobile App Ads for Installs (!) allows the each ad to target a different device. Keeping the other parameters the same, I set the underperforming ad (the one with a photo of an iPad) to only target iPads. Even one day into the experiment, it seemed like Manton was correct. The CTR for the iPad photo jumped up nicely.

After a week and a half of targeting the iPad ad to the iPad, the CTR rose from 1.5% to 3.08%. Double!

I was so impressed, I decided to try the same thing for the ad with the cropped iPhone. I targeted it to only display on iPhones or iPod Touches.

This time I didn't expect to see a huge jump in performance. Why? Remember, in the previous article, the iPhone ad was already out-performing the iPad ad. If the Manton hypothesis was the only explanation for the differences in CTR, that implies that there were a lot more iPhone or iPod Touch users getting my ads. The diagram below shows how the ad with the iPhone Photo gets a higher CTR when both ads get the same mix of iPhone and iPad users.


As the diagram shows, the iPad photo (right side) gets a lower CTR because the viewers as a whole are dominated by iPhone users. According to the Manton Hypothesis, iPhone users aren't as likely to click on a photo of an iPad. That’s why the pie is smaller on the right, and why that pie is mostly iPad clicks.

But the iPhone photo has the reverse situation: the iPhone users still dominate, but this time they are seeing a iPhone photo. So in this case the majority of the users see a photo which matches the device in their hands -- a favorable situation. This leads to the bigger pie on the left. This time the less interested party is the iPad users. They are the smaller percentage of the folks seeing the ad. Their diminished CTR has a smaller impact on the aggregate CTR.

So, what happens when you target the iPhone ad at only the iPhone users? Just as the Manton Hypothesis predicts, the CTR improved, and the impact of targeting the iPhone ad to only iPhone and iPod Touch users wasn’t as large. The CTR for the iPhone photo the week before the change was 2.686%, and was 3.128% after the change.

Ad Description Combined CTR CTR Targeting only the pictured device
iPad Photo1.5%3.08%
iPhone Photo2.686%3.128%

Noise

But here is an important point: the lifetime Combined CTR when I was indiscriminately showing an iPhone photo to both iPhones and iPads was 2.931%. The baseline I picked for the numbers above were for the week before my change. The improvement looks pretty small when compared to the larger baseline. 2.931% vs. 3.128% doesn't seem as exciting as 2.686% vs. 3.128%.

Why was the week-prior CTR lower than the all-time CTR? I don't know for sure. The numbers I’m dealing with here are small. I’m not spending hundreds of dollars a day on ads, and I’m not getting a huge number of installs. I don't have a $50,000 advertising budget. These tests are being done for $5 a day.

My experiments here come from 1,000’s of clicks, not tens of thousands or millions. The sample size may not be large enough. What looks like an insight might just be noise. So take these results with a grain of salt. Or, even better, run your own experiments using your own money.

If you have a small budget like this project, the best cure for uncertainty is to hedge your bets and keep re-checking your assumptions. If you have real money riding on an outcome, it makes sense to double check your work. At the very least, be prepared to revert your changes!

Making a Model

I did have another idea for examining our results. What if we could mathematically model our hypothesis and see how it fits the data. I would feel more confident of the hypothesis if I could make a model that makes a decent prediction about a different data set.

One cool thing about these Ads is that we can see the size of the potential audience for each ad. The audience for the iPad Ad is 182,000 people. The audience for the iPhone Ad is 620,000 people. The only difference between these audiences is that one targets the iPad and the other the iPhone / iPod Touch.

So, lets make lots of assumptions about the size of the audience and the probability of getting a iPad versus a iPhone user. Lets assume that if we don't target the iPad or iPhone specifically, the probability the ad will be shown on either device is proportional to the size of the audience. For instance:

Probability(iPad) = 182,000 / (182,000 + 620,000) = 23%
Probability(iPhone) = 620,000 / (182,000 + 620,000) = 77%

So, now we can make some assumptions and create a model for the iPhone ad targeting both iPads and iPhones:

77% * sameDeviceCTR + 23% * differentDeviceCTR = combinedCTR

Or visually:


Now we can do algebra:

23% * differentDeviceCTR = combinedCTR - (77% * sameDeviceCTR)

differentDeviceCTR =  (combinedCTR - (77% * sameDeviceCTR) ) / 23%

now assume combinedCTR = 2.686% (the iPhone image CTR when targeting both devices) and sameDeviceCTR = 3.128% (the iPhone image CTR after targeting only iPhones)

then differentDeviceCTR = 1.2%

Now lets take the differentDeviceCTR we just calculated from the iPhone ad and see if it predicts the outcome for the iPad Photo ad in the same situation: targeting both iPhones and iPads.

In this case, the equation looks a little different because we're flipping sameDevice (now iPad, because we're considering the iPad image) and differentDevice (now iPhone):


77% * differentDeviceCTR + 23% * sameDeviceCTR = combinedCTR

Now we plug in the same numbers from before:

77%* 1.2%  + 23% * 3.128% = combinedCTR

combinedCTR = 1.64%

This model doesn't seem too horrible! It predicted 1.64% CTR for the iPad photo ad when targeted against both iPad and iPhone. The reality was 1.5%. I'm pleasantly surprised. Again, the Manton theory seems quite reasonable. I'll leave it to you to see what happens if we use the other iPhone photo combinedCTR of 2.931% baseline -- the model doesn't agree as well.

Conclusions

So what do we conclude from this exercise? For one, targeting your ads specifically to the iPad or iPhone user could be worth your time. I doubled the CTR of my under-performing ad with two clicks.

Even more importantly, running experiment on your ads can really pay off. And the steps aren't difficult: form a hypothesis, run an experiment using ads, collect the data, and make a simple model. With a model, you can try to predict the impact of your change.

With this first bit of new knowledge, maybe I'll save tons of money on ad spend. And then maybe I can apply what I learned to other areas of the sales funnel. And then I can try another experiment, learn, and implement. Maybe my tropical app island isn't entirely out of reach.

I’m really glad that Manton commented on my last article. Thanks! An extra set of eyes is invaluable!
*No, it’s not called the iTouch! Also, be aware that Facebook lumps together the iPhone with the iPod Touch. For certain questions that could be important.

** Yes, technically it should be TTR, not CTR, since you tap on an iOS device.

Monday, April 28, 2014

A/B Testing for the iOS App Store

Update May 1, 2014: Manton Reece had a great question about my results. Scroll to the end for details.

As someone with a career attached to the iPhone App Store, I sometimes feel jealous of the folks who sell things on the web. Websites can use analytics and split testing to learn lots of things about how to make their product more profitable.

In the App store, you feel lucky to see your sales numbers a day after they happen. If Apple tracks how customers found my app’s page, the number of visitors, or how much time they spent, they don't share it with me.


This shortage of information has interesting consequences. First, there are lots of tools out there that try to help developers figure out what's going on in the app store. Tools like SensorTower, App Annie, Flurry, and AppCase.

Second, you'll find lots of lore on how to boost rankings, get listed higher in searches for keywords, and how to get featured by Apple.

Finally, there are tricks we use to get better reviews in the store.

These techniques are nice, but they aren’t proactive or customer focused. Even the best of these tools tell you almost nothing about the organic traffic coming to your App Store listing. It isn’t even clear what impact an improved ranking in the app store has on conversions.

Am I supposed to take it on faith that efforts spent on improving my rankings will be repaid by increased sales? I want tools that help me build a product that customers want to pay for. I also want tools to make it easy for customers to find my product.

Rob Walling's book Start Small Stay Small advocates that a developer-entrepreneur worry about developing the product last. Finding a market for a product, and figuring out how to reach it are the first priorities. Once the entrepreneur has found a market, she can tailor the product to fit.

Can mobile app developers can do something similar? Can we learn about the market for our apps in spite of the opaque App Store, or are we doomed to just make apps and fight our way up the charts?

I don't think we're doomed. I've decided to stop treating the App Store like the mouth of Moving Average's customer acquisition funnel. Instead, I've been experimenting with Facebook's Mobile App Ads for Installs.

These ads are cool because you can target an audience based on the things users have expressed an interest in on Facebook. Not only that, but you can tap into some interesting data about who is clicking on your ads. Note that I’m not saying Facebook is the only solution. I hear that Twitter has some similar tools. I just haven’t had a chance to play with them yet.

My Facebook ads are now the mouth of the customer acquisition funnel. Each ad has a small amount of copy and a 1200 x 627 image. To make my first ad, Facebook requested two different images. Out of the gate, I would have an immediate split test! Cool. And now my customer acquisition funnel looks like the below image.


Note that I still have organic traffic that might throw off my understanding of who is getting through the checkout stage. Since this is an app that is relatively new to the App Store, and it doesn’t rank very high in any search or rankings, I can make some assumptions. The real benefit here is trying to understand why folks are clicking through the ads. I’ll be able to get a better handle on this when I install the Facebook library in the app — it is supposed to let you attribute installs to their ad campaigns.

To make my A/B test, I decided that one image would feature an iPad showing my app and one image would feature an iPhone.

I opened one of my existing iPad screenshots and realized that Facebook was asking for a strange image resolution. I spent some time experimenting on how to resize the asset from the app store to fit the Facebook ad. By the time I got the iPad mockup looking OK and then uploaded it, I was feeling impatient. Below is the image for the first ad.


Like I said, I was feeling impatient. I opened my iPhone mockup and haphazardly cropped off parts of the top and bottom of the phone so the image fit the required dimensions. Not my best work, but I figured I could always replace it. I uploaded the image and launched my ad campaign. You can see the haphazard image for the second ad below.


When I looked at my campaign the next day, which ad do you think was doing better? The second ad with my haphazard, off-the-screen iPhone! After seven days, the ad with the iPad image had a 1.6% click-through-rate while the iPhone had a 3.7% CTR. That’s a pretty big difference that held fairly constant.

With my next app update, I'll replace my first App Store screenshot image with something more like the winning Facebook ad. My hypothesis is that the continuity from the ad to the store listing will help sales. I'm also hoping that the organic App Store traffic will feel attracted to the image as well.

Let me know if you find this sort of post interesting and I'll try to write more about the business of selling a product in the App Store.

Update: Manton Reece of Core Intuition fame had a great question after reading my article, which you can read on App.net. Basically, he asks if the difference in ad performance could have resulted from the differences in iPad versus iPhone impressions. In my words, the hypothesis is: "Users are more likely to click on an ad that features the same device they view the ad on." One of the assumptions behind that hypothesis is that more of my ads are getting viewed on iPhones rather than iPads.

Unfortunately, I was unable to find a way to report the iPad vs iPhone split from the past impressions. Fortunately, the ads do allow targeting along that split. To test the hypothesis, I'm going to change the iPad ad to only target iPads. If the hypothesis is correct, I would expect the CTR to increase for that ad.

If that seems to work, I will also test targeting the ad with the iPhone against only iPhone users. The hypothesis would predict that ad would also get a higher CTR targeting only iPhones. The effect might not be as strong because, again, I assume more Facebook users view Facebook on the iPhone. Still, wouldn't it be wild if I could target each specific color of the iPhone 5c?

If Manton's hypothesis is correct, I've still made the correct decision for the app. I've already submitted an update where I replaced the first screenshot with an image that looks like the second ad, but matches the target device. iPad users on the app store will see an iPad with the top and bottom cut off. iPhone users will see the same iPhone as in the second ad.

Thanks Manton, I'll have a good laugh at myself if the image composition ultimately has nothing to do with the CTR! Even if the composition does have an effect, it's a great experiment. And I'm reminded again that getting third-party opinions and doing things in public is a good idea.
*Moving Average Inc. is a participant in the Amazon Services LLC Associates Program, an affiliate advertising program designed to provide a means for sites to earn advertising fees by advertising and linking to amazon.com. Buying items through this link helps sustain my outrageous camera addiction and is much appreciated!

Saturday, November 9, 2013

Sony NEX-6 Long Term Review

The time seems right for a long-term followup review to the Sony NEX-6*. Sony recently announced two new high end cameras using the same lens mount as the NEX-6, but featuring larger full-frame sensors. The new cameras are called the Sony Alpha a7 and the Sony Alpha a7r, and they appear to be targeting the professional photographer. These bodies both have large, high resolution sensors mounted in durable splash-proof bodies.
Colors of Burano
The Colors of Burano
I expect that the addition of these impressive-looking cameras on the high end of the spectrum will increase interest in the midrange E-Mount camera bodies. Why? I imagine that some folks will want to test out the NEX system with the expectation of later growing into the new full-frame cousins. Although the new a7 and a7r seem to have reasonable prices for their capabilities, they are still expensive, high end cameras.

The crop-frame NEX line of cameras also has a few minor advantages over the new a7 besides price. There are many more lenses on the market designed for the NEX than for the full-frame a7 and a7r. Sure, you can use a crop-frame E-mount lens (most of the lenses launched before the Alpha a7 and a7r qualify) with any E-mount camera, but those lens won't let you take advantage of the full sensor area of an a7 or a7r. Depending on what kind of photography you enjoy, you might discover that the most suitable lens isn't designed to fill an entire full-frame sensor.
Venetian Cafe
Cafe in Venice
On the other hand, there is no reason you can’t use a full-frame lens on a crop-sensor NEX camera. I personally never owned a full-frame Canon camera even though most of my lenses were designed for the full frame. I tell anyone who asks to spend more on great lenses rather than great camera bodies. You will probably find that you use a given lens much longer than a given body. The technologies in camera sensors change much more rapidly than the technology in the lens: just ask the folks who are using ancient Pentax, Leica, and other manual-focus lenses on modern cameras. You don't have to buy the best body to enjoy and get value from a fantastic lens.

Read on to see how the NEX-6 has treated me over the past ten months. All of the photos you'll see in this review were made with the NEX-6. Click on them to get a larger view.

Smart Phone Integration

In my first review of the Sony NEX-6, I noted how terrible the PlayMemories Android and iOS (iPhone / iPad) apps for the camera was. Maybe Sony heard my whining because several new revisions of the PlayMemories app have been released. Now I would say the apps are at least mediocre. That might sound bad, but it is a big upgrade over terrible. At least the apps work now. Now I can go to an event, take photos with my NEX, send them to my iPhone, iPad, or Android phone, edit them, and share them with just a few minutes of work. Like I mentioned in my last review, the camera makes fantastic photos. The extra steps involved in using the NEX instead of the iPhone 5’s built in camera is often worth it.
Big Shade
Big Shade
So how does the sharing to the Android work? In one method, you first go to the photo you want to share , hit the menu button, select “Playback”, select “View on smart phone,” and them select “This image”. At this point you can open the PlayMemories app, enter the password for your camera (for the first use only), and then wait a few seconds for the phone to connect to the Camera’s wifi network.

For the iPhone, you need to use the phone’s settings app to connect to the Camera’s wifi network before launching the PlayMemories app. For both platforms, the process takes maybe thirty seconds if it goes well. The Android app has crashed for me several times. I have also had issues when more than one of my devices connects to the same NEX-6. If more than one smart phone or tablet connects to the NEX-6, the sharing functionality seems to fail. It took me a while to realize what was happening. Bummer!

If all goes well, you will see a thumbnail of the image you were viewing on the camera. Tap the thumbnail to get a larger preview, tap it again to select it, and then hit the copy button to copy the photo to your phone's gallery. The app has a share button, but in my limited testing, it doesn’t seem reliable. Unless you can persuade the share button to work, you’ll have to go hunting in the gallery to find the photo you just copied over.

Lens Adapters

Another new development since my initial review is the RJ Camera "Electronic Aperture Canon EOS (EF, EF-S) mount lens adapter to Sony E mount", which allows me to attach my big beautiful Canon glass to the NEX. The adapter I ordered allows the camera to control the aperture, capture the EXIF data from the lens (focal length, and possibly some other data), and to perform autofocus. I purchased this adapter so I could use the variety of Canon EF mount lenses I already own. Note that there are several different competing adapters that allow you to connect a Canon lens to an E-mount body.
Harvest Tools
Harvester
Sadly, the autofocus using this adapter seems limited to the contrast based methods (the usual NEX-6 phase detection seems to be disabled), and feels really slow. Occasionally, the autofocus just gives up. The autofocus feature of the RJ Camera adapter doesn’t provide a great experience. It is useful in certain situations, but I mostly manually focus my Canon lenses, relying on the focus peaking and the ability to zoom in on the live view.

I mentioned in my initial review that the Sigma 30mm lens only focused using contrast detection. The Sigma feels reasonably fast to focus. Don't count on getting similar autofocus performance on the RJ Camera adapter. The focus behavior with the RJ Camera adapter attached jumps to what seems like a series of coarse focus points before dialing in at a finer level. Sometimes the camera gives up before the entire process completes. I've mostly been using this functionality with My Cannon 100mm IS L Macro lens. Different lenses seem likely to have different results. The camera has a very difficult time focusing with my Canon 8-15mm L fisheye lens.Your mileage may vary, but it seems unlikely you will get the kind of focus speeds needed for action photography.

Luckily, the NEX-6 has two nice innovations to assist with manual focus. First, it offers focus peaking. Focus peaking highlights areas in the viewfinder which are in focus with a colored fringe. It seems to work by highlighting high-contrast transitions at the pixel level. If you don't have an extremely fast aperture, it is an easy way to verify focus — as long as there is an area of high contrast for it to identify.
Troll Door
Troll Door
The other tool the NEX-6 offers is the ability to zoom in to the live view from the viewfinder or rear LCD display. Press a button, zoom in, focus. This takes more time than the focus peaking, but if does offer higher precision. Note that with the RJ Camera adapter, the in-lens image stabilization of my Canon lenses is disabled while using the zoomed in live preview. Unless you have a very wide lens, you’ll find this behavior disappointing. IS would really help keep things steady while focusing my Canon EF 100mm f2.8L IS Macro lens.

My one final comment is that the tripod collar which came with the RJ Camera adapter didn’t have a long enough screw to securely tighten it to the adapter. I purchased a pile of washers and a longer screw at Home Depot for a few bucks. Also, once you remove the body from the adapter, nothing but friction holds the collar on. That’s OK, unless you get confused and try to hold the adapter by the tripod collar. Do that without the body attached, and you might drop your lens. Be careful!

Durability

In my original review of the NEX-6, I complained about losing the viewfinder eyecup while walking around the Magic Kingdom. I’m still a bit disappointed in that experience, but since switching my carrying system away from the Black Rapid, I haven’t lost an eyecup again. If you plan to hang your camera upside-down from the tripod mount, you might start losing $12 eye cups too.
Speaker Food
Elegant Food
In case you’re curious, I now use a PeakDesign Leash and also a PeakDesign CapturePRO. The Leash is a very versatile shoulder strap that can be rapidly removed or reconfigured to become a tether to attach to your belt. The leash can be made quite long too, which allows you to hold the camera weight across the shoulders rather than just around the neck like a tourist.

The Capture is a system which securely holds a camera to a belt or strap using a specialized (but compatible with arcs-swiss tripod heads) plate. It’s a great way to completely remove the weight of a camera from the shoulders, and you can tighten it so that the camera doesn’t bounce around when you walk or run.

Like my Canons, my NEX-6 has had some rough treatment from me. It has been bumped around in bags with just a light neoprene padding. It has swung from my shoulders, and been bumped into people. The camera has been drizzled on, had various tasty sauces spilled on it. And it has pretty much survived without complaint. In fact, there is very little visible evidence that it has had a tough life at all. The only exception was the dang viewfinder eye cup that I lost about ten months ago.
Daily Driver
Daily Driver
Occasionally, the kit lens will fail to register on the camera. It’s always been an easy fix though: turn off the camera, remove the lens, re-attach the lens. The poor plastic lens housing has been abused enough to have a bit of an excuse.  The 16-50mm kit lens spends more time on my camera than any other lens I own. It isn’t the best glass in the world, but it sure is light and versatile. Adobe Lightroom does a fine job of correcting many of it’s flaws.

Battery Life

The battery life on the NEX-6 hasn’t improved, but I did buy an inexpensive set of two Wasabi batteries with a wall charger and even a cigarette lighter adapter. That means I have a total of three batteries for the NEX, and that I can charge them rapidly without worrying about the finicky USB charging on the camera body (see previous review). The three batteries have been more than plenty to get me through any day. When I travel for three or four day weekend, I sometimes leave the charger at home. I can always use USB to charge it in an emergency.

If you’re in a situation where you need the camera ready to take photos instantly, DSLR style, you will probably burn through batteries more quickly than I usually do. If you plan to use it extensively throughout a day, I suggest having at least one extra battery on hand. Luckily, the Wasabi batteries are not too expensive.

The Keeper Rate

I’m still convinced that my NEX-6 has a much higher keeper rate than my Canon 7D, or my Canon 40D. That is, I feel that more of the photos I take with the NEX-6 are sharp. With the Canon 7D, I seemed to capture a certain percentage of my photos slightly blurry, usually due to camera shake. I’m almost convinced that the dang swinging mirror in the Canon is what ruined so many photos for me. I suppose that it’s also possible that the additional weight of the dSLR somehow contributed to shaky photos too.
Sunday Exercise
Sunday Exercise
Either way, I worry less about motion blur in my photos on the NEX-6. It still can happen, but I don’t feel the need to take 3 photos of every beautiful scene.

Conclusions

For the most part, I really like the Sony NEX-6. Yes, the apps for Android and iPhone still make me weep. I develop iOS apps for a living, so I might be more picky than the average user. That said, I fell much better mentioning the feature than I did in January. The apps work much better now, even if they still frustrate me.

Also, I sometimes miss the lightning-quick focus of the Canon 7D, especially when I’m manually focusing my old Canon Glass on the NEX-6. The battery life of the Canon was far better too. And I can’t complain about the easy access to the most commonly used settings through buttons on the camera body. Every time I have to navigate a menu to change a basic setting, I miss my 7D.
Crossing Dark Waters
Crossing Dark Waters - the Bay Bridge in San Francisco
I don’t miss the size and weight of a dSLR though. The automatic modes on my NEX-6 are far more advanced and far more useful than on my Canon 7D. The NEX does a great job of picking shutter speed and aperture without my help in most situations (as long as I'm not using an adapter), and that’s great.

Likewise, auto-ISO is perfectly acceptable on the NEX-6. In my opinion the camera makes the correct tradeoff in terms of shutter speed and ISO. And I rarely feel like I need to disable automatic ISO to get a shot — something I can’t say about my Canon 7D.

I also love the electronic viewfinder, which is usable even in the dark and allows you to zoom in before taking a photo. When I use an optical viewfinder, I feel like I’m using an antique. How will I know what a photo will look like without knowing how the sensor sees the world? I can’t believe I was ever concerned about the lack of an optical viewfinder.

Over the next ten years, I see no reason for the traditional dSLR to stick around. At the moment, they have a few advantages, but think we will see the same capabilities in mirror less cameras in a few years. Cameras with moving mirrors will seem just as quaint as those antique cameras with bellows and flash powder do today.


[Article updated November 10th to include a link to the Wasabi batteries]

*Moving Average Inc. is a participant in the Amazon Services LLC Associates Program, an affiliate advertising program designed to provide a means for sites to earn advertising fees by advertising and linking to amazon.com. Buying items through this link helps sustain my outrageous camera addiction and is much appreciated!

Saturday, November 5, 2011

The Impact of Hacker News

When my article about Why Not to Make an iPhone App appeared on the front page of Hacker News, this blog got its largest traffic day ever. In one 24 hour period, there were 6014 visits. It was a lot of fun watching the visitors number explode!


I feel quite fortunate to have gotten that much interest -- especially from Hacker News, one of my favorite news sources. I think many bloggers covet traffic blasts from sources like HN, Reddit, or Tech Crunch. So I thought it would be interesting to look at the analytics of the days before and after my moment in the lime light.


Wow, look at that bump in traffic!


But the interesting metrics here are the average time on site: about 12 seconds overall. About 9 seconds from news.ycombinator.com only. And my bounce rate was around 96%.


It looks like most people never read much of my article at all. It also appears that the majority hit the back button without visiting any other pages on the site - an average of 1.05 pages per visit. 


What About Mobile Devices?


This is interesting. In terms of mobile devices, iPad is the clear winner, followed by Android, and then iPhone. Android above iPhone? Oh yeah, Hacker News. My kind of people. I wouldn't extrapolate this data to the general public.


Geography


Out of the top ten traffic sources, Germany had the top average time on site: 21 seconds. The overall leader, however, was Trinidad and Tobago which sourced one visit lasting 17 minutes and 37 seconds.


Thanks Trinidad and Tobago!


Conclusions


Well, based on this one experience, I'd say that the Hacker News traffic isn't very sticky, or terribly interested in my article. I couldn't tell you if the issue was with my content or because of some sort of impedance-mismatch with  Hacker News readers. Perhaps Mobile Apps just aren't their thing.


I also didn't notice any increase in my Twitter followers.


On the other hand, I did get contacted by a few people because of the article, and that's nice. The Hacker News Post also had about 20 comments in it, which I enjoyed reading. You'll notice that my original article had zero comments on it, possibly because nobody made it to the bottom. :)


The final word? Getting featured on Hacker News is a blast. Just don't expect it to magically force people be interested in your writing or your products.

Sunday, September 7, 2008

Project Turk

Red FezI was reminded of Amazon's Mechanical Turk a few weeks ago by a story on Boing Boing. In the article, a passenger stranded at Dulles used Mechanical Turk to collect stories and illustrations about cats. He later turned the stories into a book he sold on Blurb.

It seemed like a fantastic idea to me. I wondered how I could use the power of the Turk's hive mind to improve my life. Project Turk was born. Let's see if Mechanical Turk can help me live a better and richer life.

The first idea I settled on was to ask engineers what their favorite engineering book was. I'm a big reader. Perhaps it would be fun or inspiring to read a book from a different engineering field.

To start, I created a qualification to act as a prerequisite to the HIT. This basically amounts to a quick survey that established that the worker was an engineer or engineering student. Once a worker gets the qualification, he or she can perform any HIT (Human Intelligence Task) requiring it.

Next, I created the HIT itself, which pays a few cents in exchange for the name of a favorite engineering book. So far I've only received three responses in the past few days. I'm not too surprised; how many engineers would operate on the worker side of Mechanical Turk? I'm going to give it more time to collect data.

The next HIT I created requires no qualification except that the worker live in the US. I'm asking folks about the habits that drive them crazy, and their own worst habits. It's only been online a few hours and already I have 18 responses.There are a few really interesting themes developing. I'll probably post the results in a few days.